Test Explorer
The Test Explorer integrates with VS Code's testing functionality to provide a seamless testing experience for .NET projects.
Overview
Test Explorer automatically discovers and displays tests from your .NET projects, supporting:
- MSTest
- xUnit
- NUnit
- ASP.NET Core integration tests
Tests are organized hierarchically:
- By project
- By namespace
- By test class
- By test method
Accessing the Test Explorer
- Click the Test Explorer icon in the Activity Bar (beaker icon)
- If tests aren't automatically discovered, click the refresh button in the Test Explorer
- Alternatively, right-click on a test project in the Solution Explorer and select "Run Tests"
Discovering Tests
Test Explorer automatically discovers tests when:
- A solution is loaded
- A test project is added or modified
- The "Refresh All Tests" button is clicked
To manually refresh the test discovery:
- Click the "Refresh" button in the Test Explorer's title bar
- Use the command "C# Tests: Refresh All Tests" from the Command Palette
- Right-click in the Test Explorer and select "Refresh Tests"
Running Tests
Running Individual Tests
- Hover over a test in the Test Explorer
- Click the "Run Test" icon (play button)
- Alternatively, click the "Run" button next to the test name
Running Multiple Tests
- Select multiple tests using Ctrl+Click
- Right-click on the selection and choose "Run Tests"
Running All Tests
- Click the "Run All Tests" button in the Test Explorer's title bar
- Alternatively, use the keyboard shortcut
Ctrl+R, T
Running Tests by Group
- Hover over a test group (project, namespace, or class)
- Click the "Run Tests" icon
- All tests in that group will be executed
Debugging Tests
To debug a test:
- Set breakpoints in your test code
- Hover over a test in the Test Explorer
- Click the "Debug Test" icon (bug icon)
- The test will run in debug mode, stopping at your breakpoints
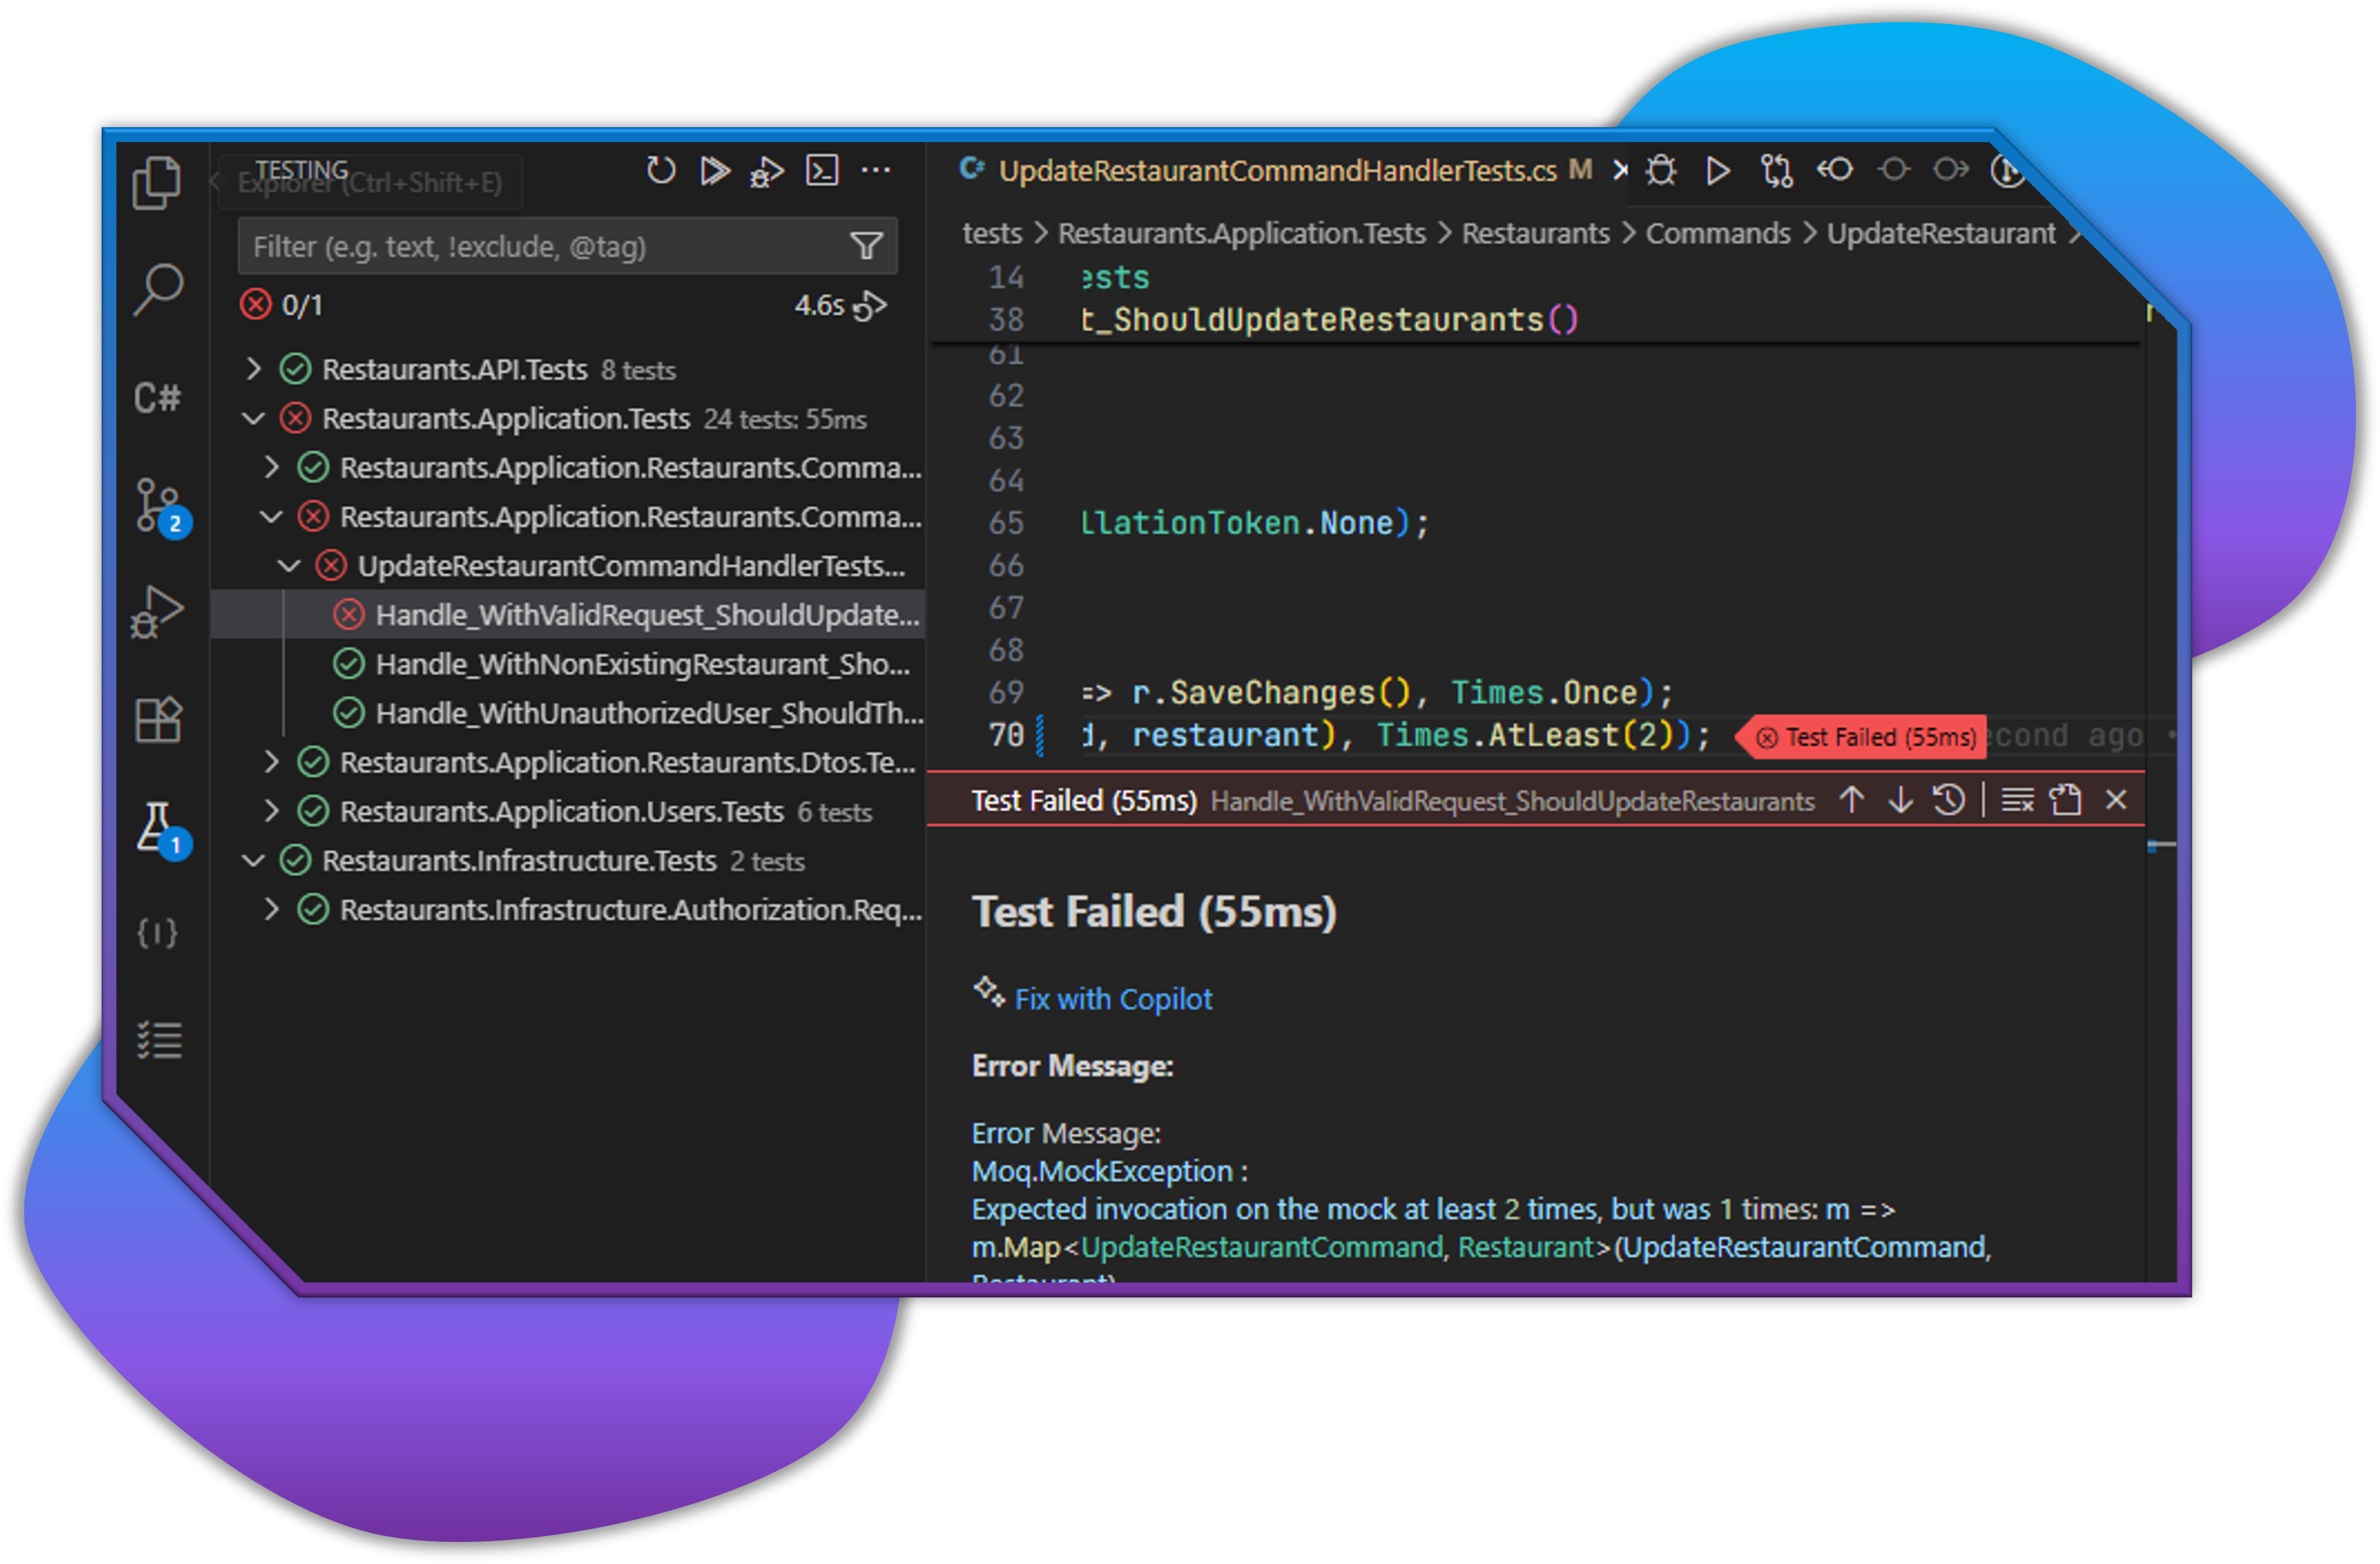
Viewing Test Results
After running tests:
-
Test icons will update to show pass/fail status
- ✓ Green check: Passed
- ✗ Red X: Failed
- ⚠ Yellow triangle: Skipped or inconclusive
-
Click on a failed test to see:
- Error message
- Stack trace
- Expected and actual values
- Source line that caused the failure
Test Output
To view detailed test output:
- Run a test or test group
- Open the Output panel (
Ctrl+Shift+U) - Select ".NET Test Log" from the dropdown
- View the detailed execution log
Test Organization
Tests can be filtered and organized:
- Use the search box to filter tests by name
- Click on the "Group By" button to organize tests by:
- Project
- Class
- Status
Test Navigation
To navigate to test source code:
- Click on any test in the Test Explorer
- The test source file will open with the cursor at the test method
- For failed tests, clicking on stack trace lines will navigate to the relevant code
Fixing Failed Tests
When a test fails:
- Click on the failed test to see the error details
- Examine the error message and stack trace
- Click on the "Fix Test with Copilot" button if available
- Copilot will suggest potential fixes based on the error
Test Settings
Configure test behavior in settings:
- Open VS Code settings (
Ctrl+,) - Search for "testing"
- Adjust settings such as:
- Auto-run tests on save
- Test explorer view settings
- Test discovery behavior